
We’re using HelpScout as our HelpDesk for all our products and we’ve solved thousands of supports requests with it. If you email us at [email protected], this email ends up in our shared inbox at HelpScout and we try to resolve your issue as fast as we can.
Having the right information in the right place is crucial for solving requests quickly and we’ve built a small but powerful HelpScout app, that displays useful information about our customers and makes it easy for us to open their account on our platform.
Let’s take a look how this looks.
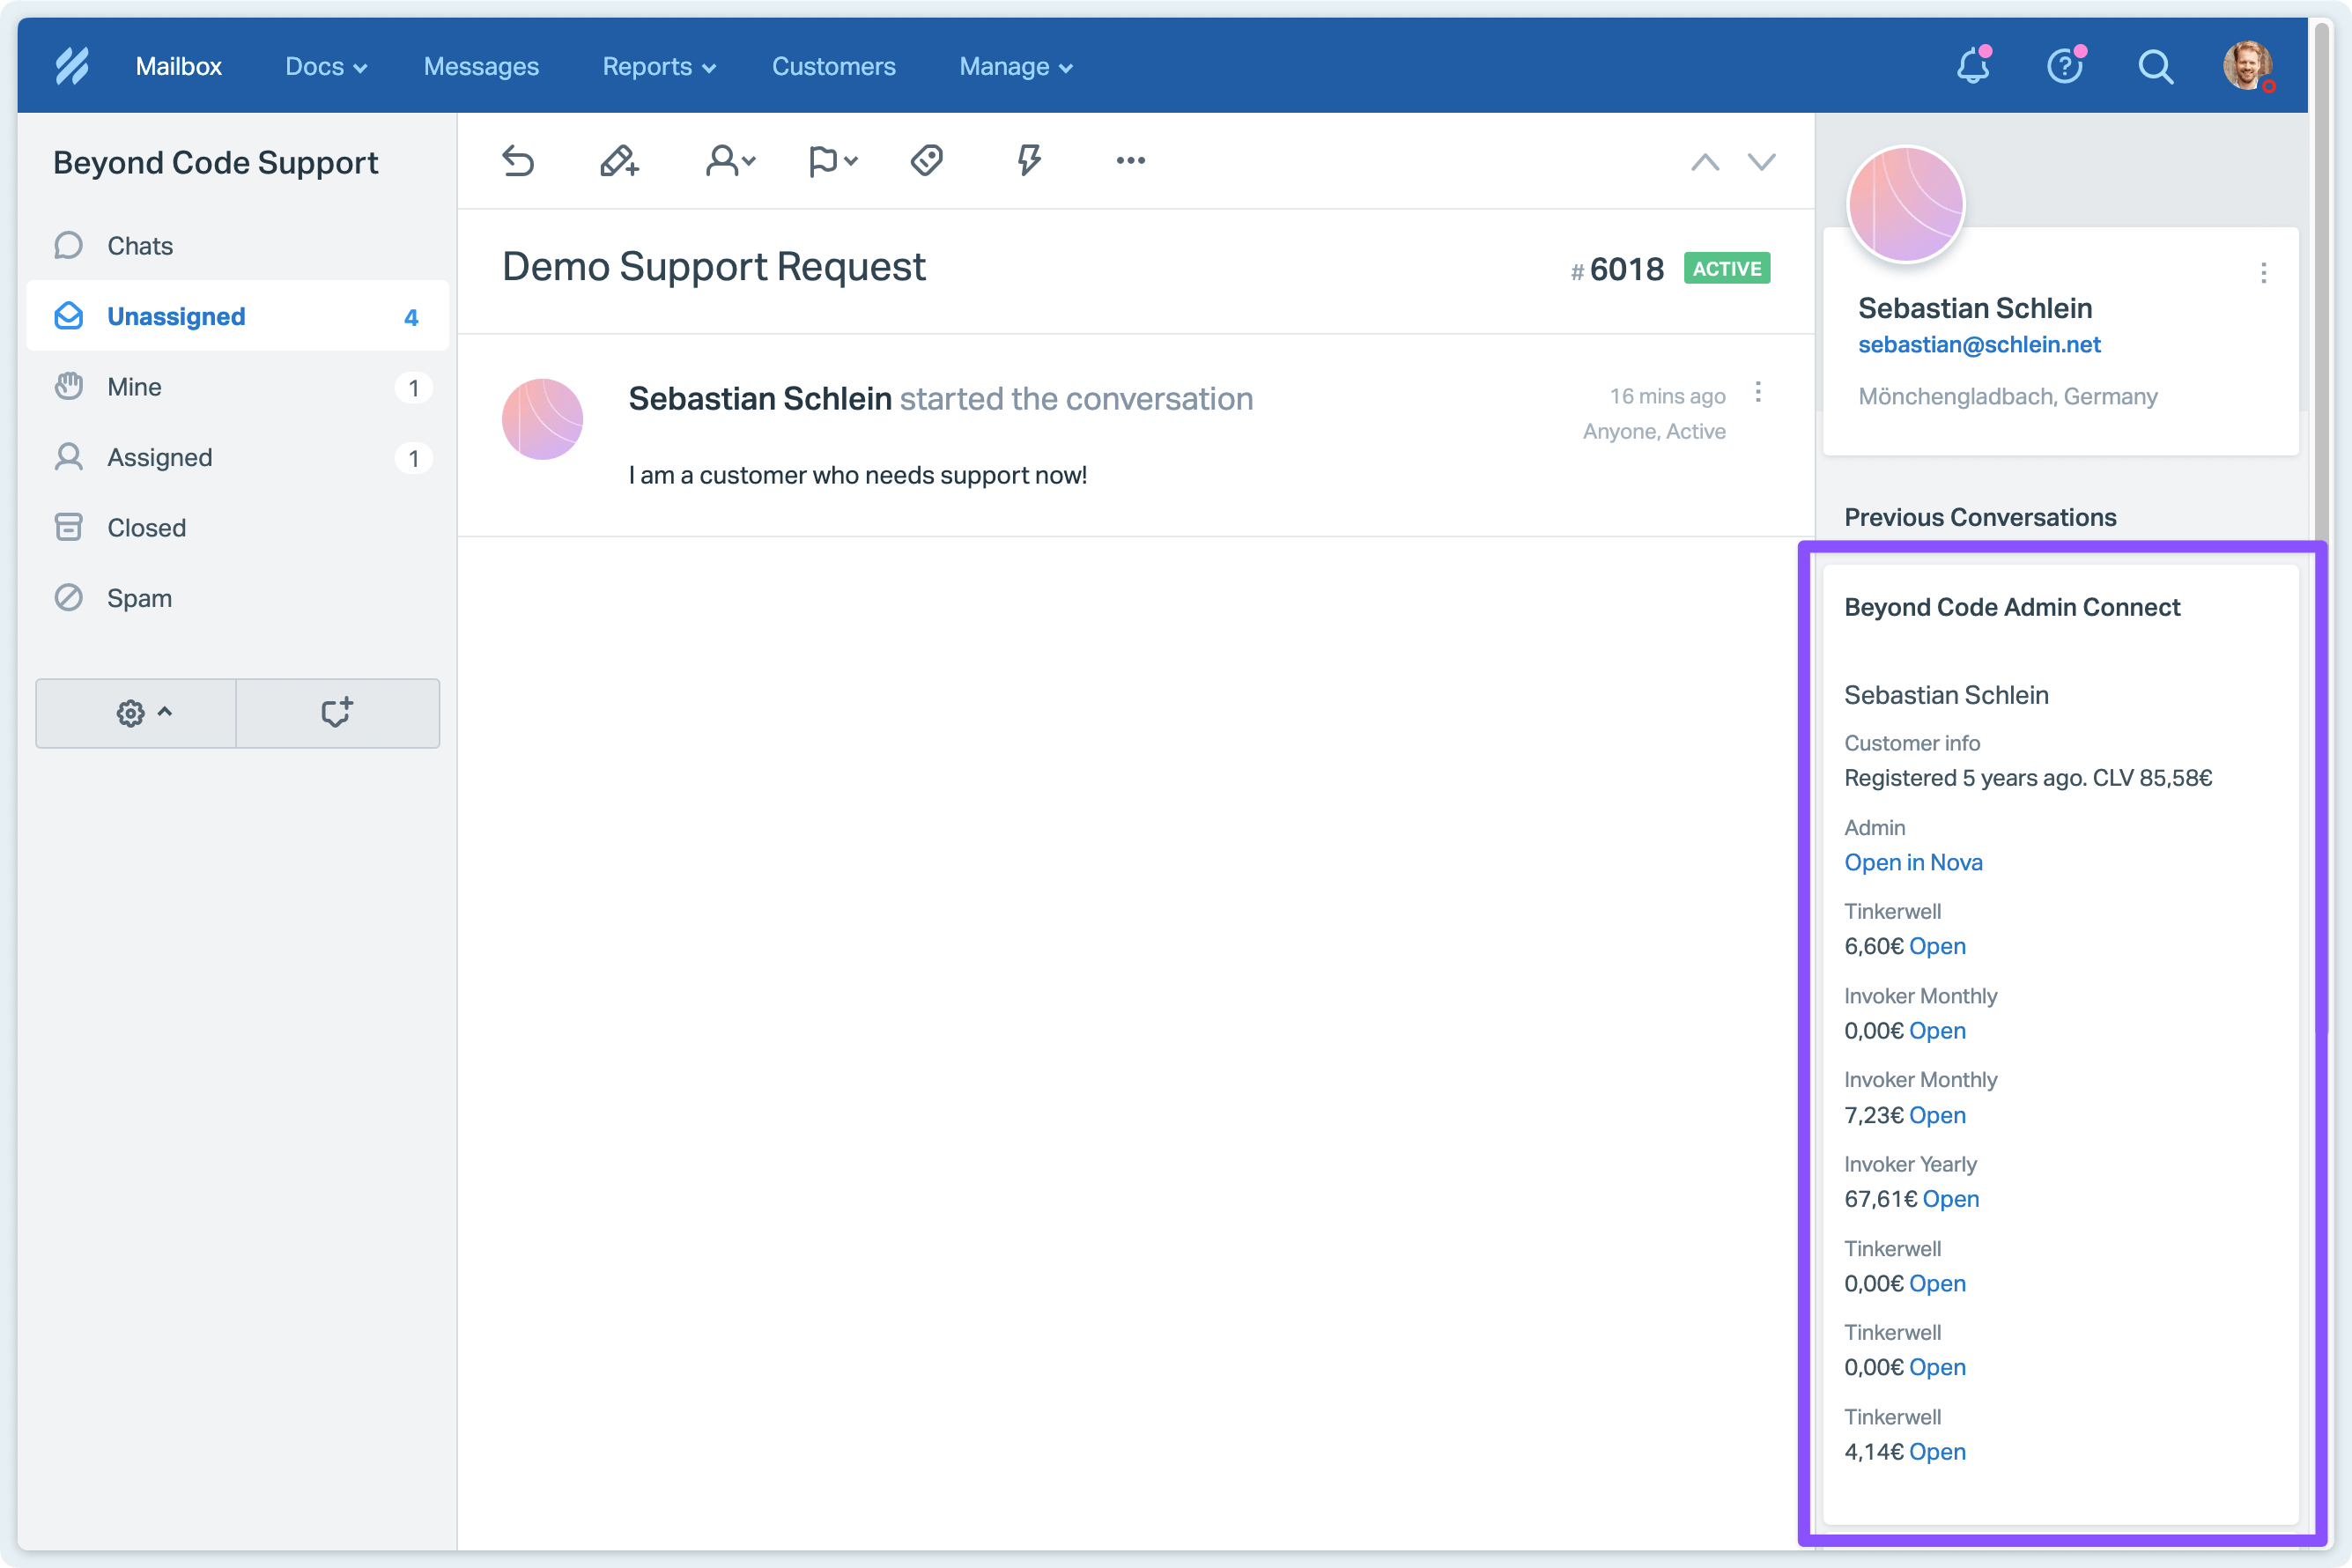
Our app connects to our platform and loads everything that it knows about the customer that opened the support request. In our case, we display the name, account information and previous orders, as well as links to them in our Laravel Nova admin system. This makes it super easy to access the information without manually looking up the customer and even jump to their account, impersonate it to look into problems that are only visible to them, etc. We also have the same app for our other platforms Expose, SendStack and What The Diff.
All this information is actively pulled from our platform when someone opens the support request and so HelpScout doesn’t need to know anything about our customers, nor do they store this information like other support tools do. It’s way less invasive than sending our customer data to our helpdesk just in case they open a support request – and it’s always the latest data that we have.
How to create the app
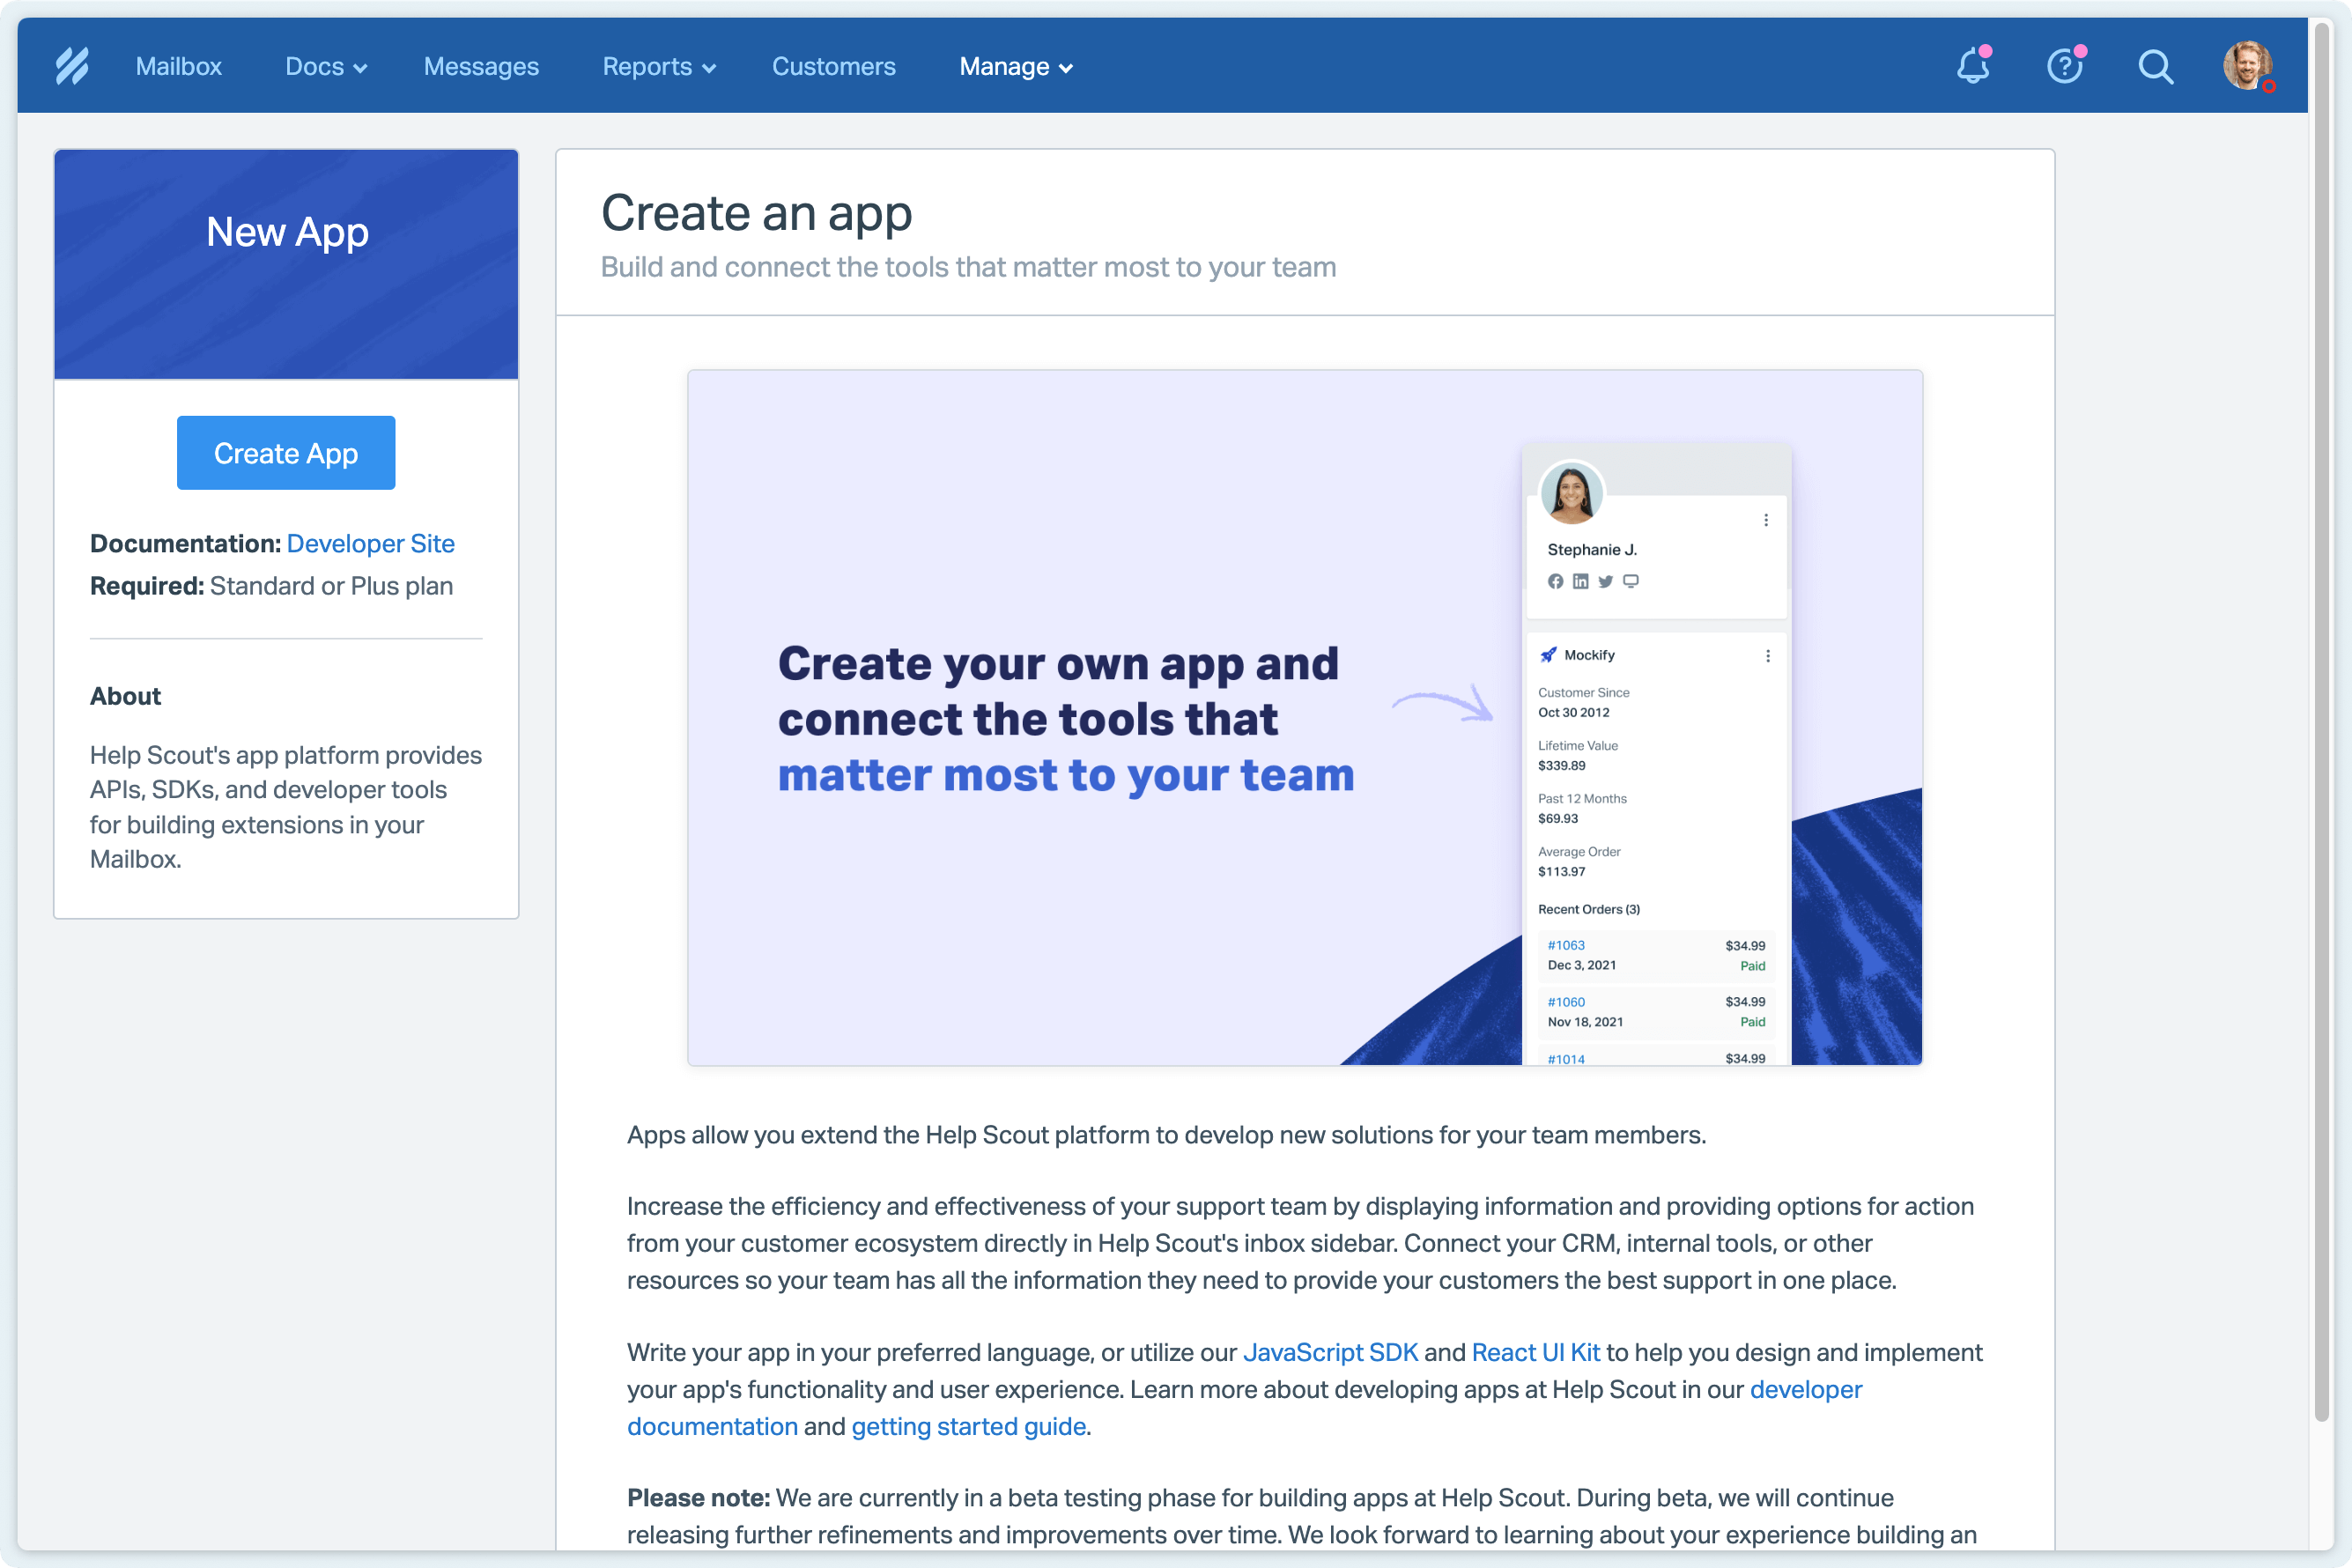
Creating a HelpScout app is straight forward if you are already a customer of them. Go to Manage -> Apps and create a custom app.
After pressing “Create App”, you need to set some settings like the name, the content type, a callback URL that HelpScout uses to access your service and a secret key that identifies HelpScout as a valid requester for the API endpoint that we’re about to build next.
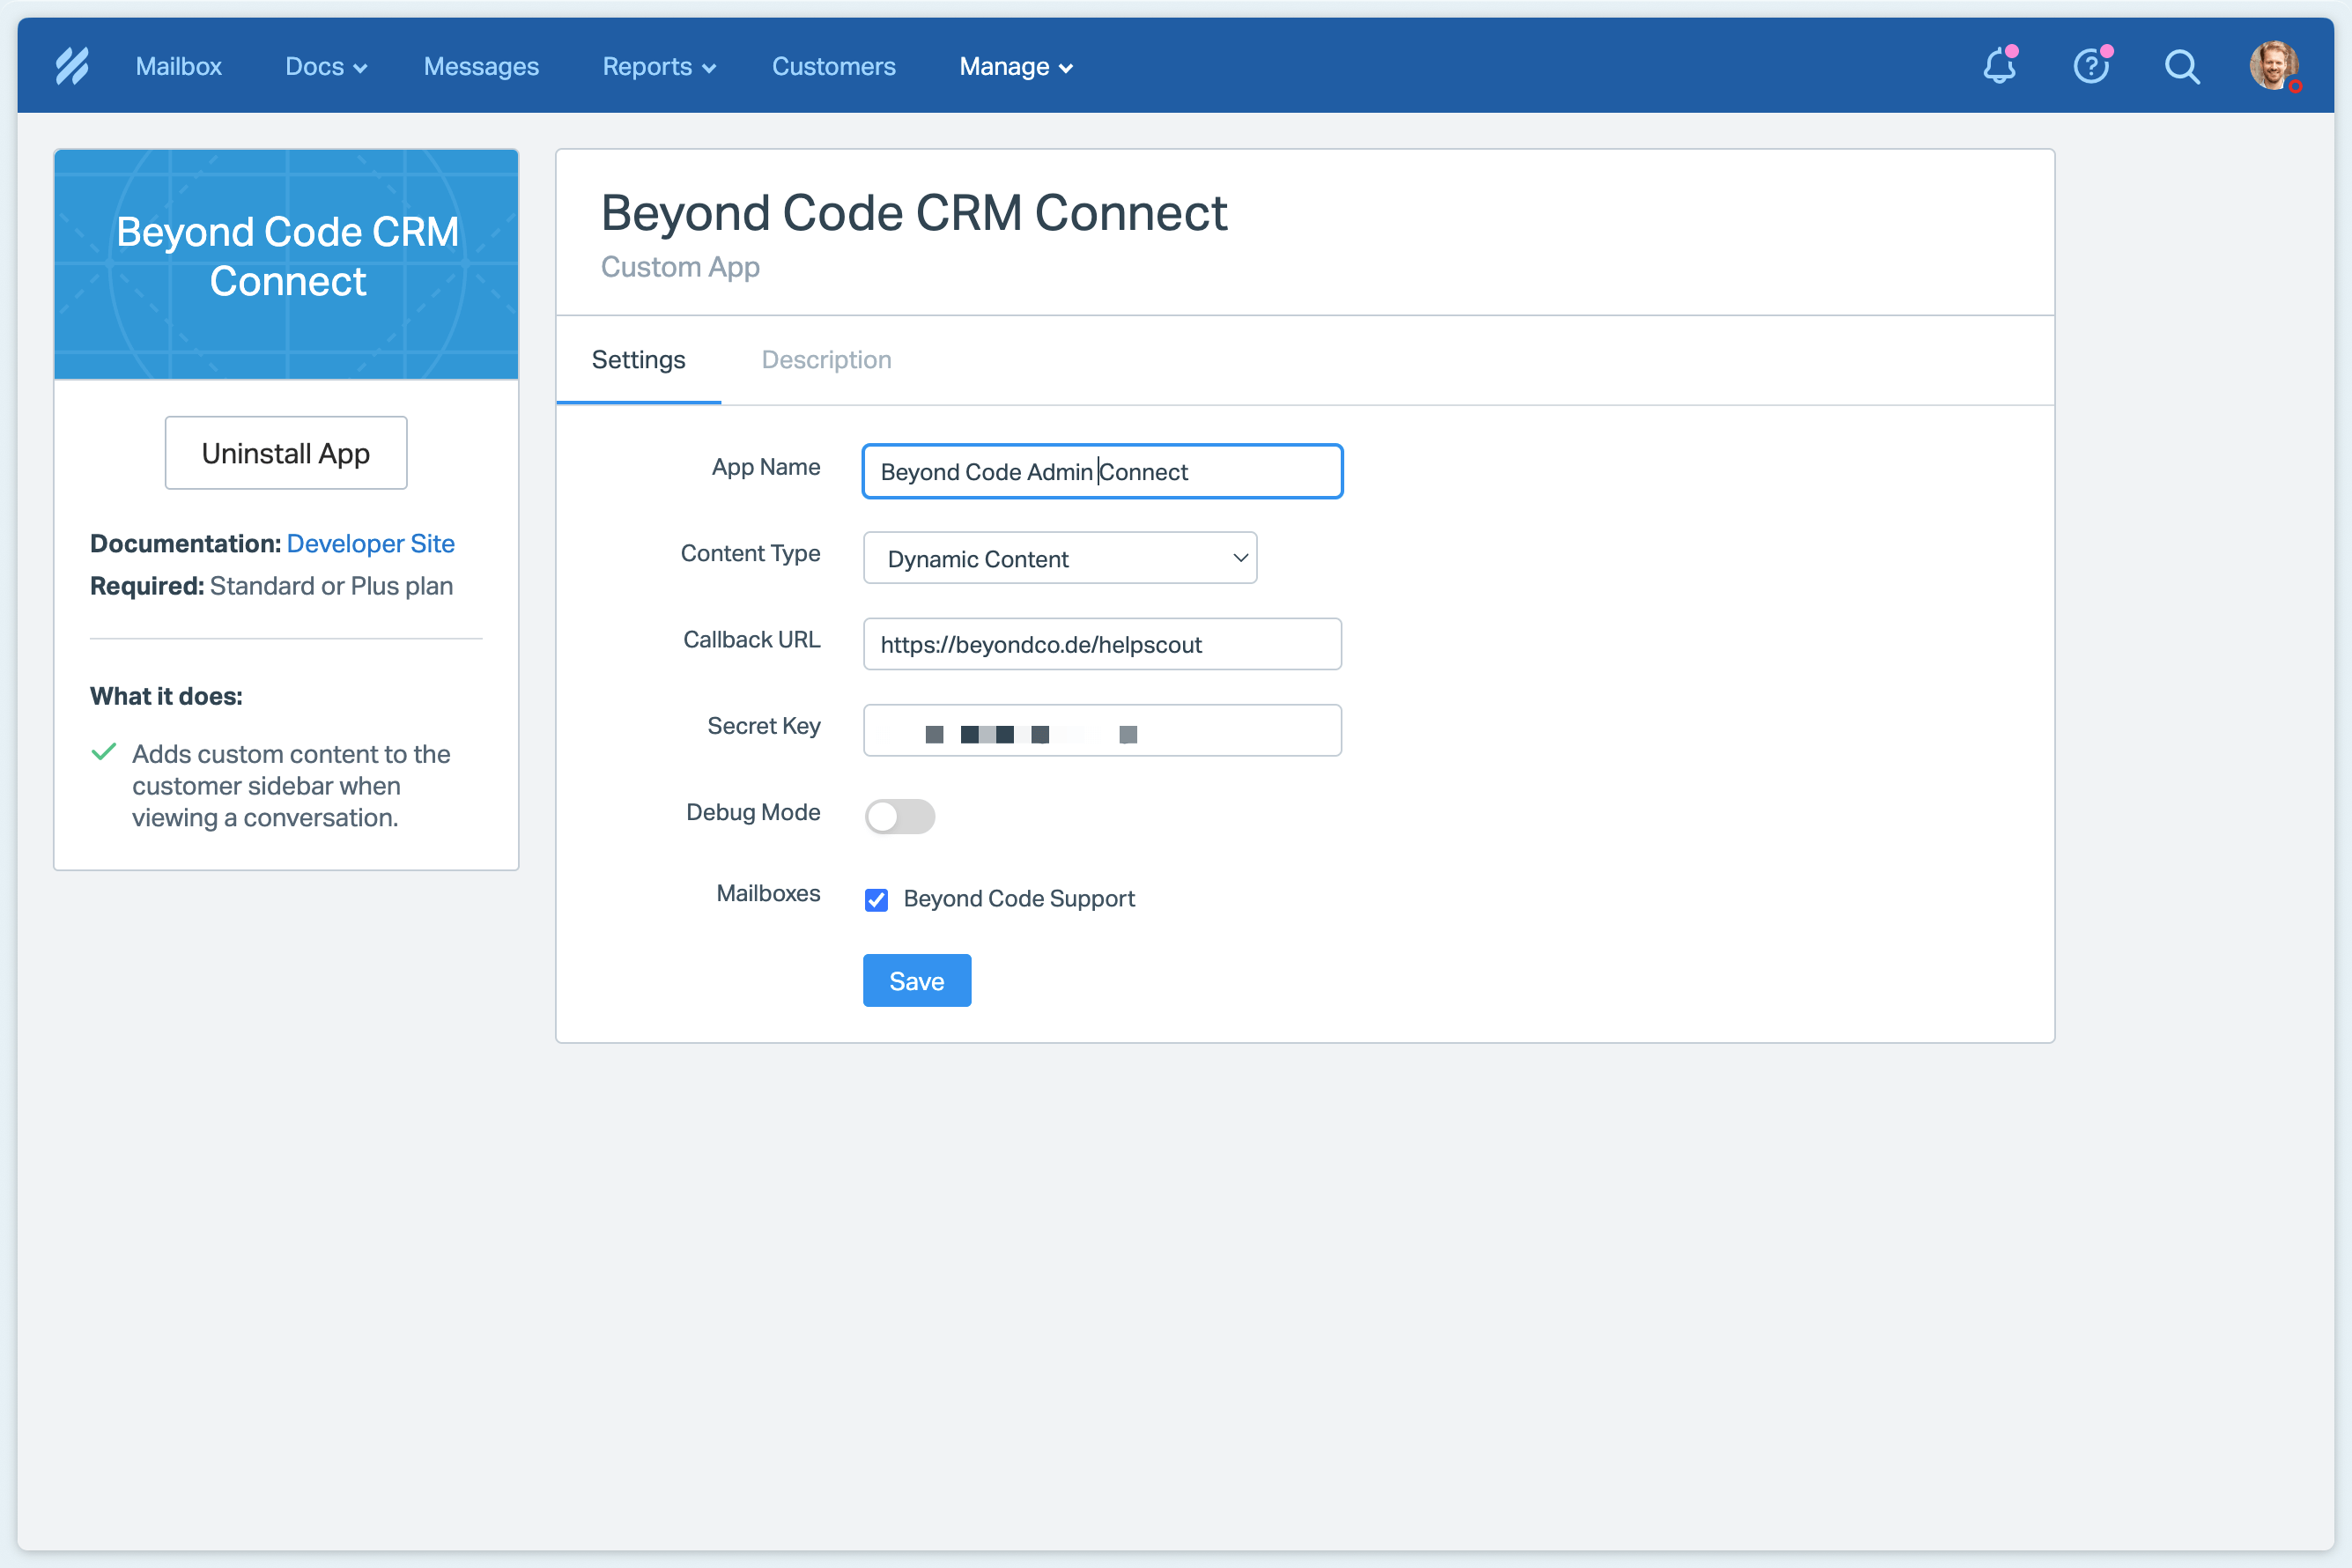
The easiest way to get started with local development is using an Expose URL for testing the callback without deploying it to a server that’s accessible via the internet. Expose creates a secret tunnel with a public accessible URL that points to your local environment so that HelpScout can access it.
You can choose whatever secret key you want, it’s a simple random string, if you don’t want to use ofuisd89fzasdf or something that you create by smashing your hands on your keyboard, you can use the Laravel Str helper for an idea, simply start php artisan tinker or open Tinkerwell and type str()->random() to get a random key.
That’s all that we need to set up in HelpScout. You can enable the debug mode during development so that in case that there is a problem, you see the result of the callback in the HelpScout debugger.
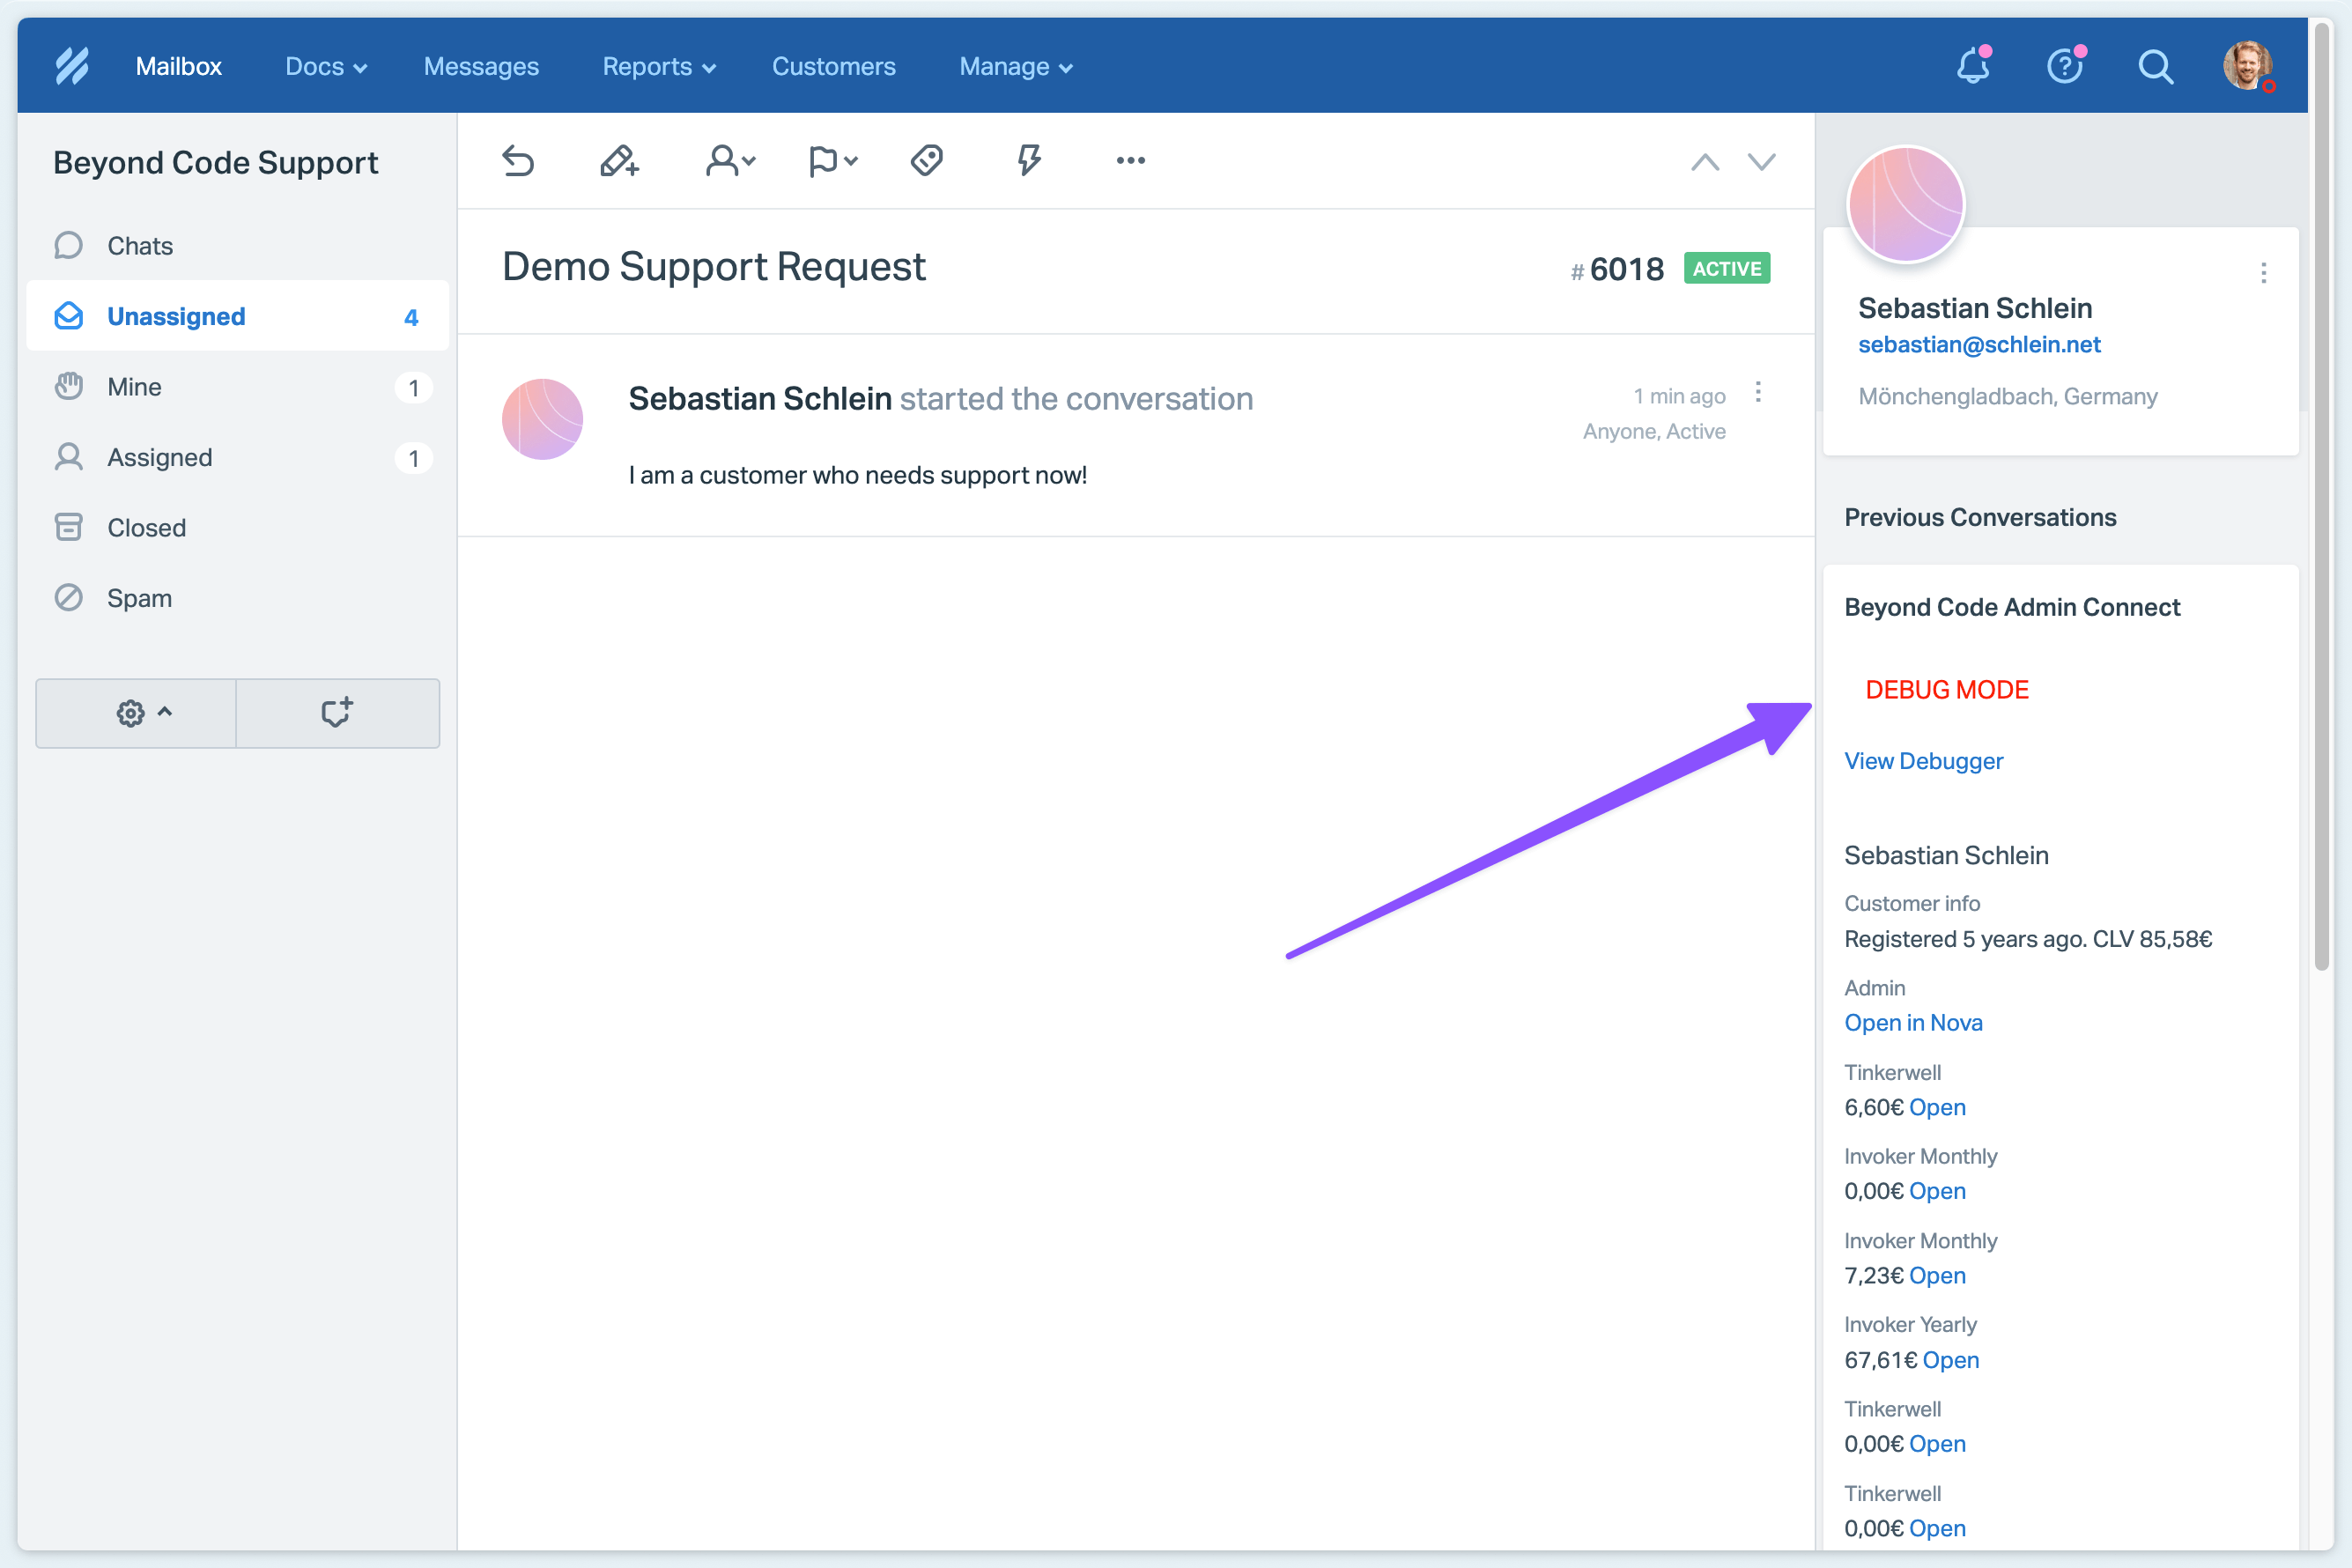
If you open the debug window, it shows you more information on the request that HelpScout sent but also of the result. It looks like this:
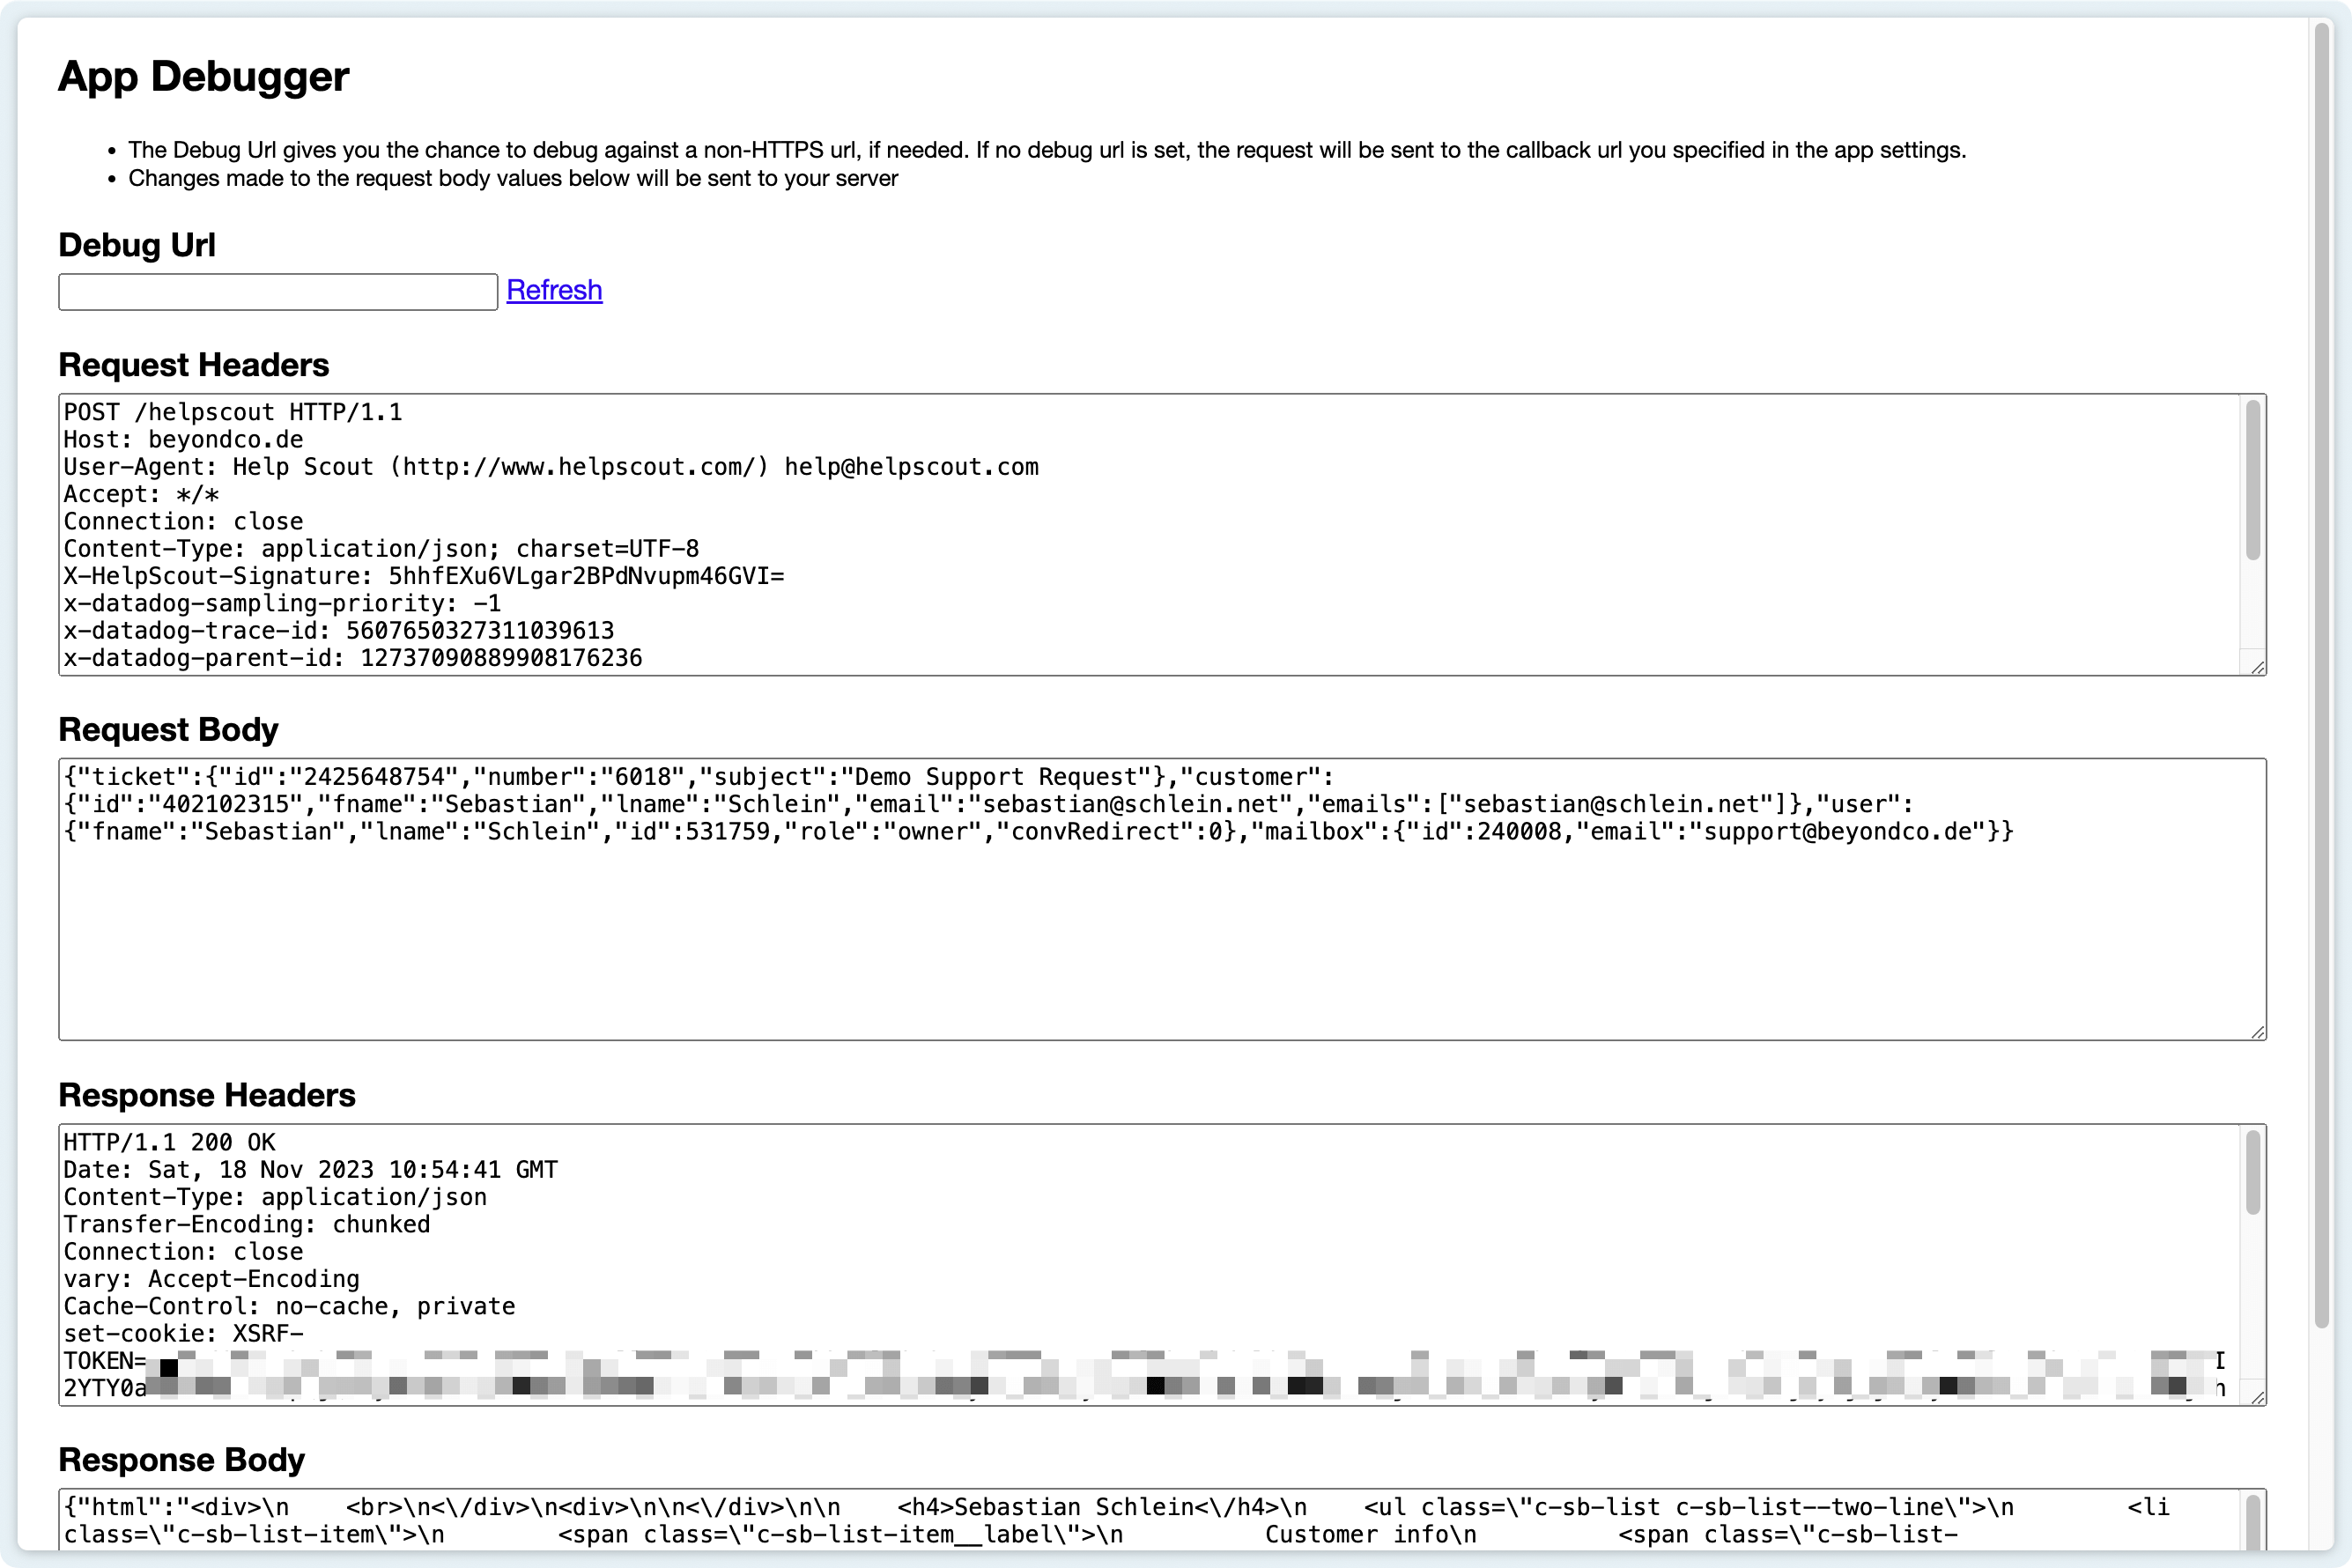
As you can see from the request body, there is the information that we can use to identify the customer on our local platform and return some HTML that HelpScout can display in the app.
Creating the API and returning the information
When you open a support request, HelpScout sends a POST request to your API endpoint to load the data.
In our basic example, we’re adding the route for HelpScout to our web.php in our Laravel application
// Target a specific method in a controller
Route::post('/helpscout', [HelpScoutController::class, 'handle']);

// Use a single action controller with an __invoke method
Route::post('/helpscout', HelpScoutController::class);
Verifying the HelpScout secret
When a request comes in, we need to verify that it comes from HelpScout because we’re about to return sensitive customer data.
$signature = Str::after(request()->header('X-HELPSCOUT-SIGNATURE'), 'sha1=');

$data = file_get_contents('php://input');

$calculated = base64_encode(hash_hmac('sha1', $data, config('services.helpscout.secret'), true));

if ($signature !== $calculated) {
	abort(Response::HTTP_FORBIDDEN, 'The signature was invalid!');
}
If the request comes from HelpScout, we can gather the data that we want to return to our app and pass this to a Blade template that renders the HTML output for us.
Collecting the information and returning the HTML
HelpScout needs a JSON response with a serialized html object, so we’re rendering the view but sending it back as a JSON response. We also check if our customer has an account or if they have orders – that’s helpful if they placed an order but haven’t created an account yet. If we don’t find a user or an order in our platform we display that we haven’t found useful information.
$user = User::where('email', $request->customer['email'])->first();
$orders = Order::where('email', $request->customer['email'])->get();

if ($user || $orders) {
    return response()->json([
        'html' => view('helpscout.sidebar', [
            'user'   => $user,
            'orders' => $orders,
        ])->toHtml(),
    ]);
}

return response()->json([
    'html' => 'This user has no account and there is no order with this email address.',
]);
Creating the view
When creating the return view, HelpScout offers CSS classes that you can use to style the output. While there are just a few available and you are pretty limited on what you can do, this makes the output very consistent in your inbox and it blends nicely in the existing UI.
In our view, we check if we found a user or orders and return the specific information as we need. In our platform, we can return the order information if we find a user because they are related to each other – this might be different for your application but should be understandable.
<div>
    <br>
</div>
<div>

</div>

@if ($user)
    <h4>{{ $user->name }}</h4>
    <ul class="c-sb-list c-sb-list--two-line">
        <li class="c-sb-list-item">
        <span class="c-sb-list-item__label">
          Customer info
          <span class="c-sb-list-item__text">Registered {{ $user->created_at->diffForHumans() }}. @if($user->orders()->count() > 0)CLV {{ number_format($user->orders()->sum('balance_earnings')/100, 2, ',', '.') }}€@endif</span>
        </span>
        </li>
        <li class="c-sb-list-item">
        <span class="c-sb-list-item__label">
          Admin
          <span class="c-sb-list-item__text"><a href="https://beyondco.de/nova/resources/users/{{ $user->id }}">Open in Nova</a></span>
        </span>
        </li>
        @foreach($user->orders as $order)
        <li class="c-sb-list-item">
        <span class="c-sb-list-item__label">
          {{ $order->product_name }}
          <span class="c-sb-list-item__text">{{ number_format($order->balance_earnings/100, 2, ',', '.') }}€ <a href="https://beyondco.de/nova/resources/orders/{{ $order->id }}">Open</a> </span>
        </span>
        </li>
        @endforeach
    </ul>
@elseif($orders)
    <h4>Orders</h4>
    <ul class="c-sb-list c-sb-list--two-line">
        @foreach($orders as $order)
            <li class="c-sb-list-item">
    <span class="c-sb-list-item__label">
      {{ $order->product_name }}
      <span class="c-sb-list-item__text">{{ number_format($order->balance_earnings/100, 2, ',', '.') }}€ <a href="https://beyondco.de/nova/resources/orders/{{ $order->id }}">Open</a> </span>
    </span>
            </li>
        @endforeach
    </ul>
@endif
Our view displays the customer name and links to the admin panel, so that we can easily open this in a new window and dig into their detailed account data. It also displays the CLV, the products that they use more.
If you only sell one product, you can add much more specific product information to your app. Examples of that are the last time when they used it, their payment plan, etc.
Having your customer information available without searching to additional systems makes support so much easier and enjoyable. So if you are doing the customer support for your own product yourself or want to treat your support teal well, this is a very simple to build app that helps your service team a lot.